It’s time for you to learn how to make cultured butter and cultured buttermilk in your own home. Cultured butter is not only deliciously rich and tangy, but it’s incredibly easy to make. All you need is a little time. Cultured butter is super expensive at the store, which is why making it at home will always be worth it. The best part about making cultured butter is the thick, rich and creamy cultured buttermilk you have leftover. Yes, the same kind of buttermilk you buy at the store. Plain heavy cream will give you sweet buttermilk, which thinner and less opaque, while still great for many uses. But if you want that rich, thick, good stuff? You gotta culture it!
What is cultured butter?
Cultured butter is fermented with live bacteria cultures which give it a slightly sour/tangy flavor. This tanginess actually compliments the fattiness of the butter — it’s all about balance. Because of the fermentation process, it’s also considered to be healthier for your gut, and easier to digest. Basically, it has probiotic benefits.
Cultured butter also has a higher fat content than regular butter. Let’s just be real — butter, whether cultured or not, is delicious! But if we can make it a little better for us, why not?
How long do I ferment the cream?
After trial, and not much error, I’ve found that 3 days is better than 2. I tested this recipe at 2 days, and while it gave me amazing cultured butter, I wasn’t 100% pleased with the thickness of the buttermilk. It was FAR more opaque than using plain cream, but it gave me the consistency of just regular whole milk. Please believe it still got used because it’s still liquid gold! But I really wanted a thicker cultured buttermilk with body, like the kind I buy from the store.
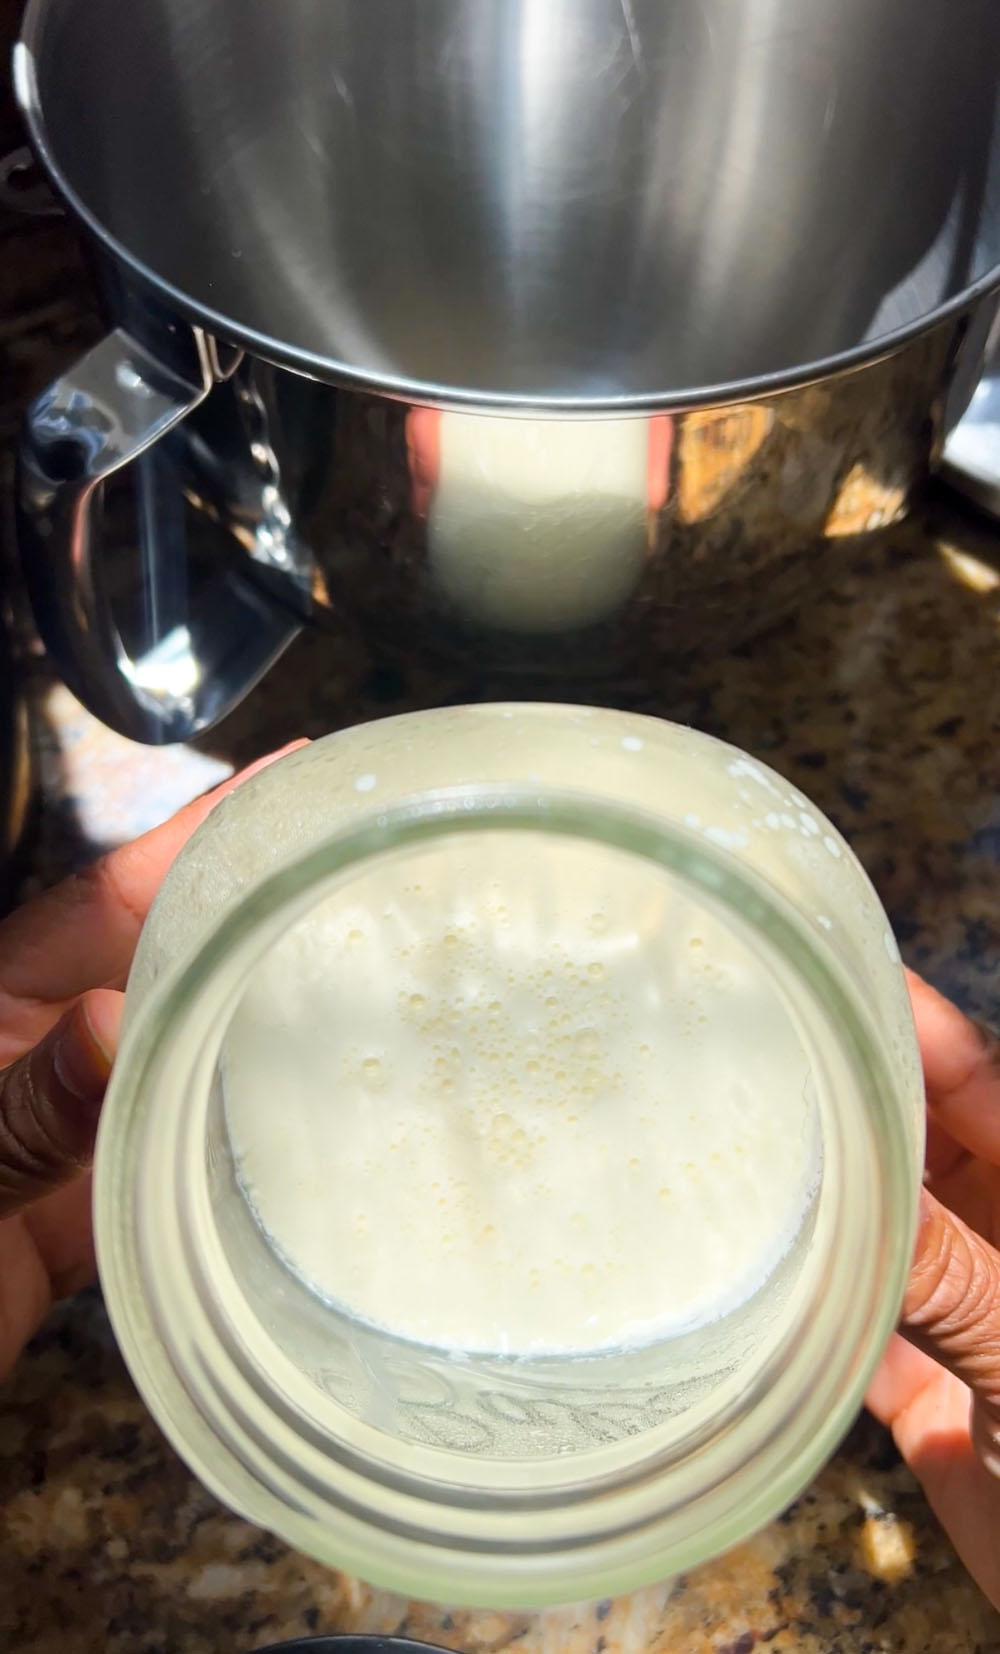
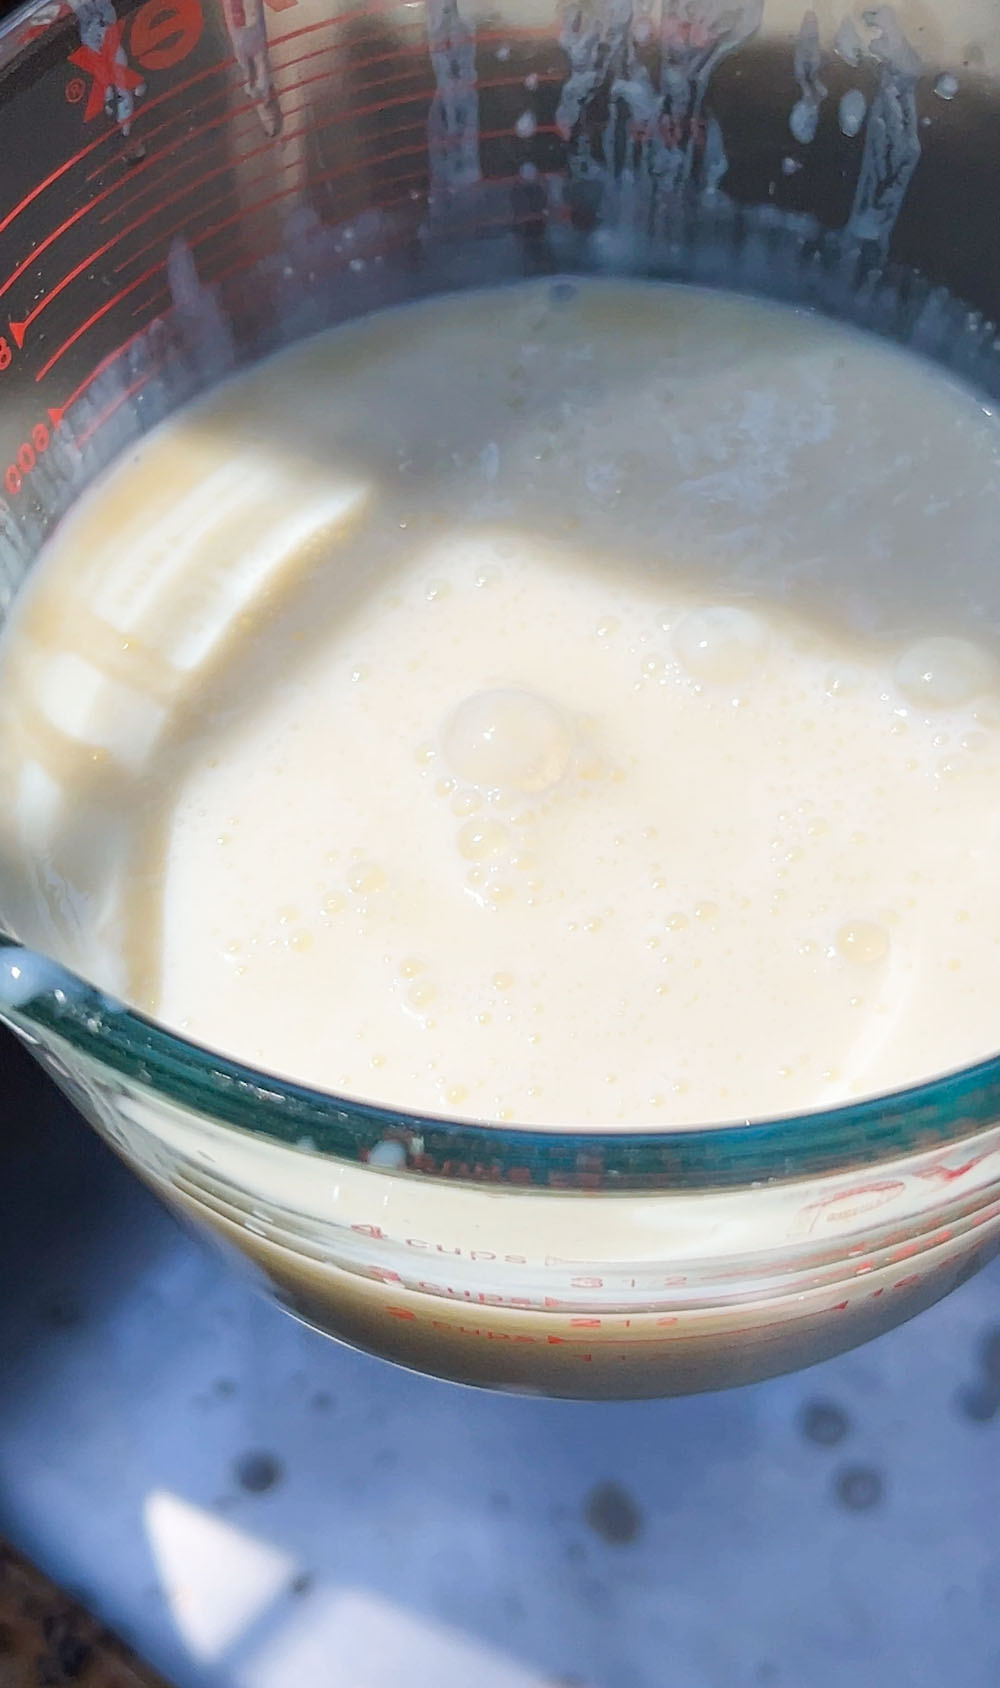
After 3 days, we basically have creme fraiche. It’s thick, and as I tilt the jar, it doesn’t move. It smells deliciously tangy and pleasantly fermented.
Look how thick! This is going to make incredible cultured butter and cultured buttermilk.
After 3 days you will see that the cream has gone from a fluid liquid to a stiff, thick creme fraiche. Yes, at this point, you’ve basically made creme fraiche. Now, if you want to keep it as creme fraiche, just stick it in the fridge in an appropriate container. But if you want to turn this into butter and buttermilk, you’ve gotta whip it up!
I have not tried timing this recipe past 3 full days, but I know some people have gone a bit longer with their own recipes. Personally, 3 days is absolutely fine and the perfect sweet spot.
How to make cultured butter and buttermilk
If you can make regular butter (heavy cream only), you can make cultured butter. It’s EASY! Simply add an already-cultured dairy product to heavy cream, and let it ferment at room temperature (68-75 degrees F) over the course of 3 days.
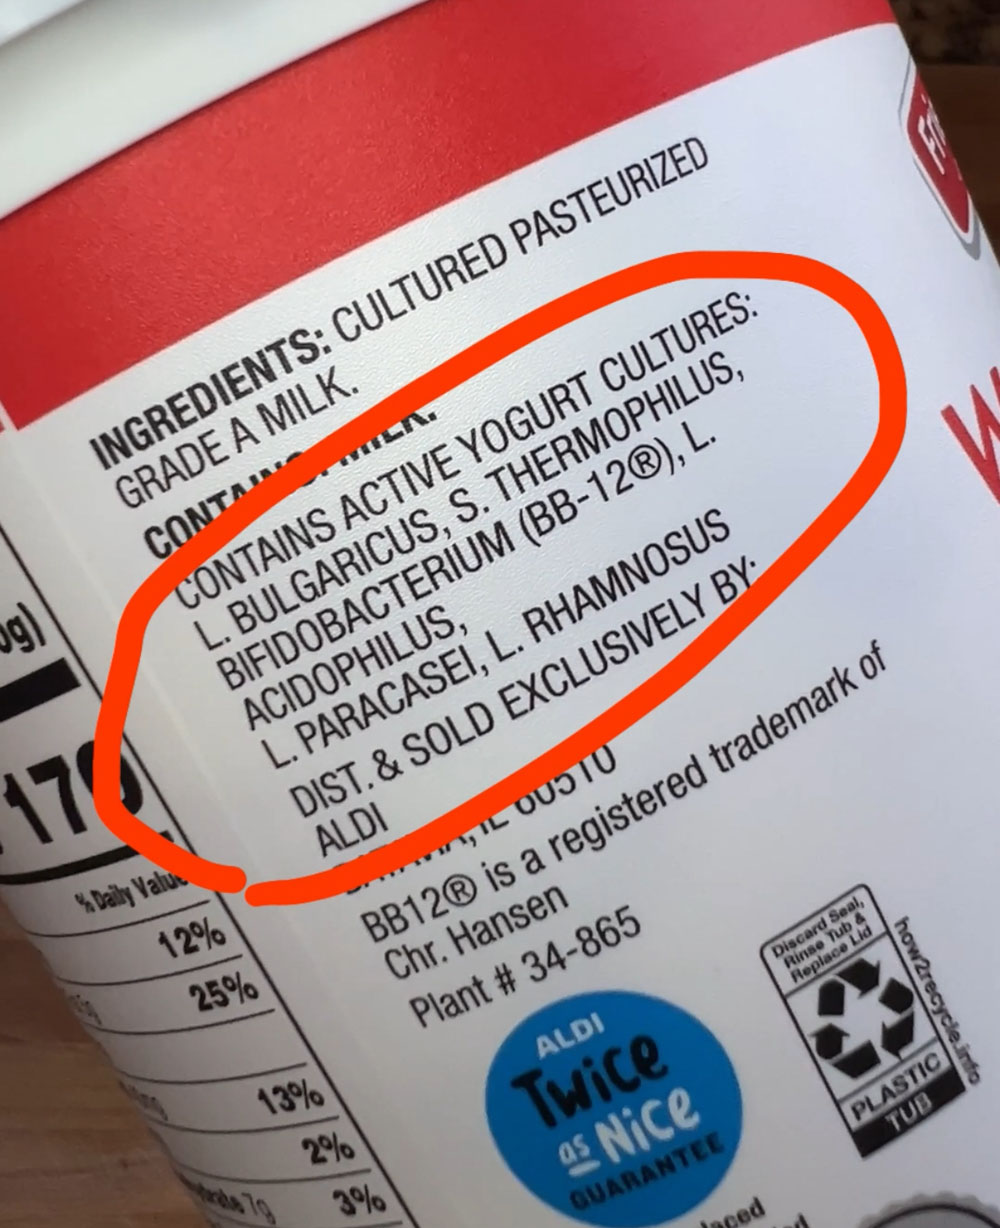
Make sure whichever cultured product you use has LIVE CULTURES on the label!
Which cultured products to use?
- Store-bought cultured buttermilk
- Cultured sour cream
- Cultured yogurt (unflavored/unsweetened)
- Cultured creme fraiche
- Kefir
You’ll want to ferment the heavy cream and choice of cultured product in a glass container, with a breathable cloth covering the opening. I use basic cheesecloth secured with an elastic band. Pick a cloth that’s CLEAN that doesn’t have any odors, because those odors will end up in your final product and you don’t want that.
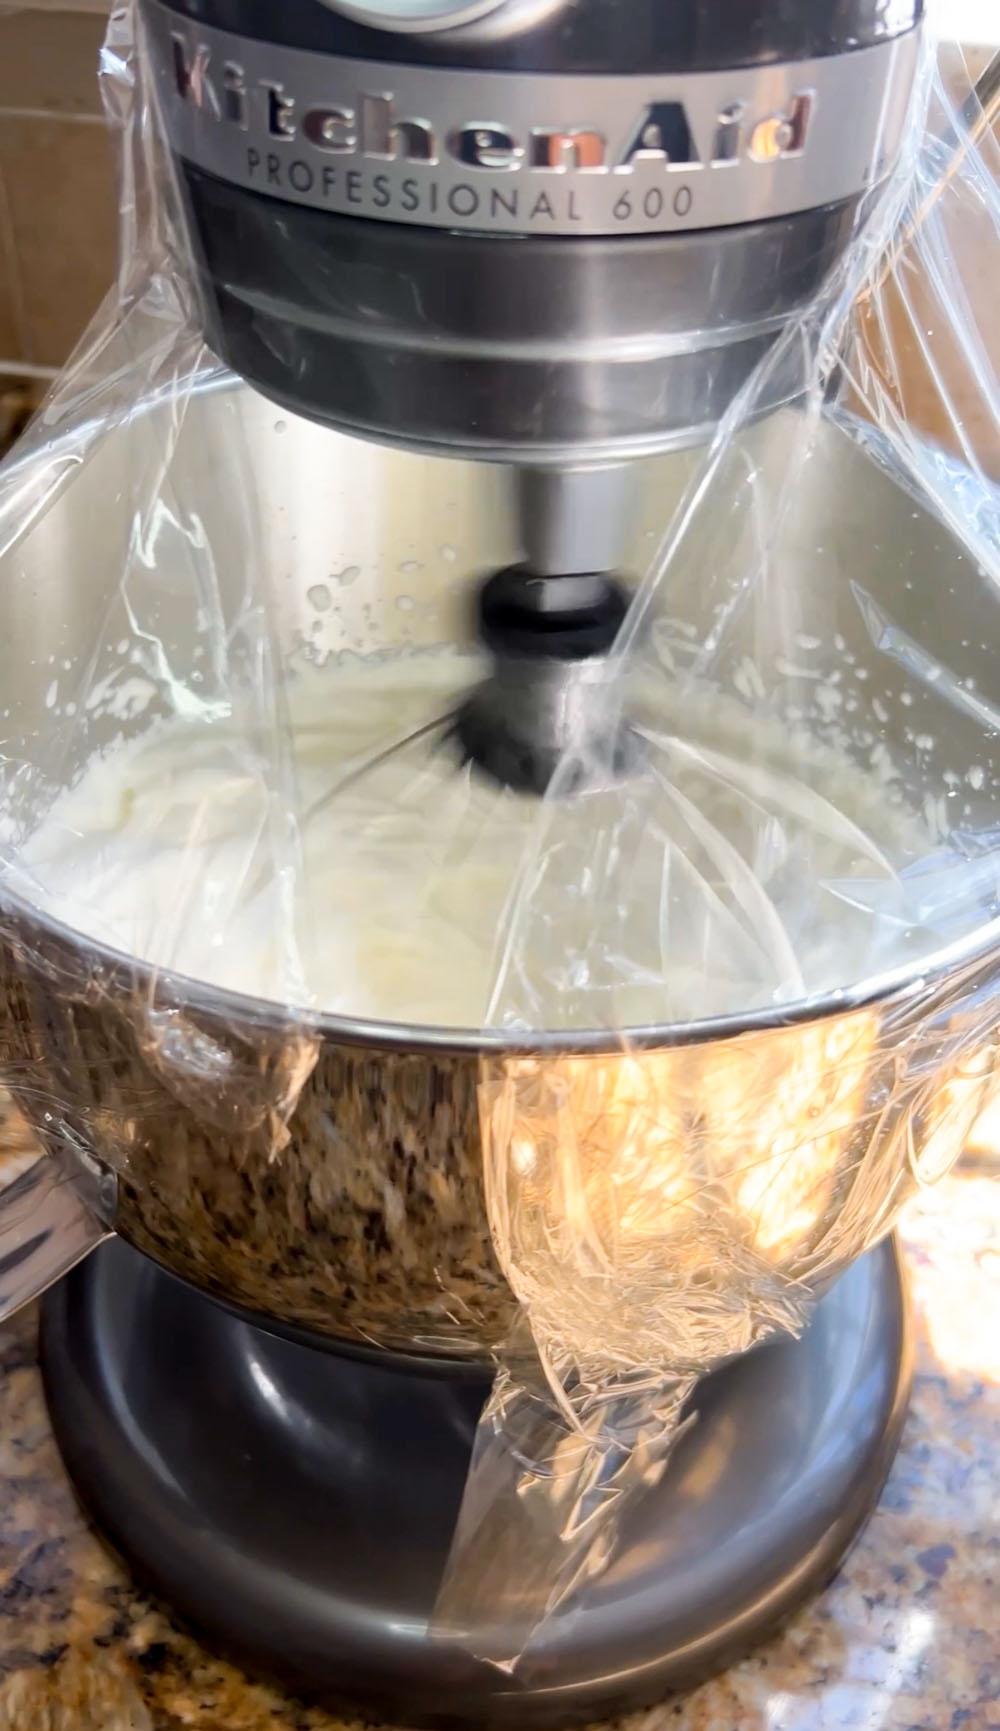
If using a stand mixer, things can get messy. This baby splatters! So protect your workspace by draping cling film around the bowl, otherwise your countertops will be wearing it.
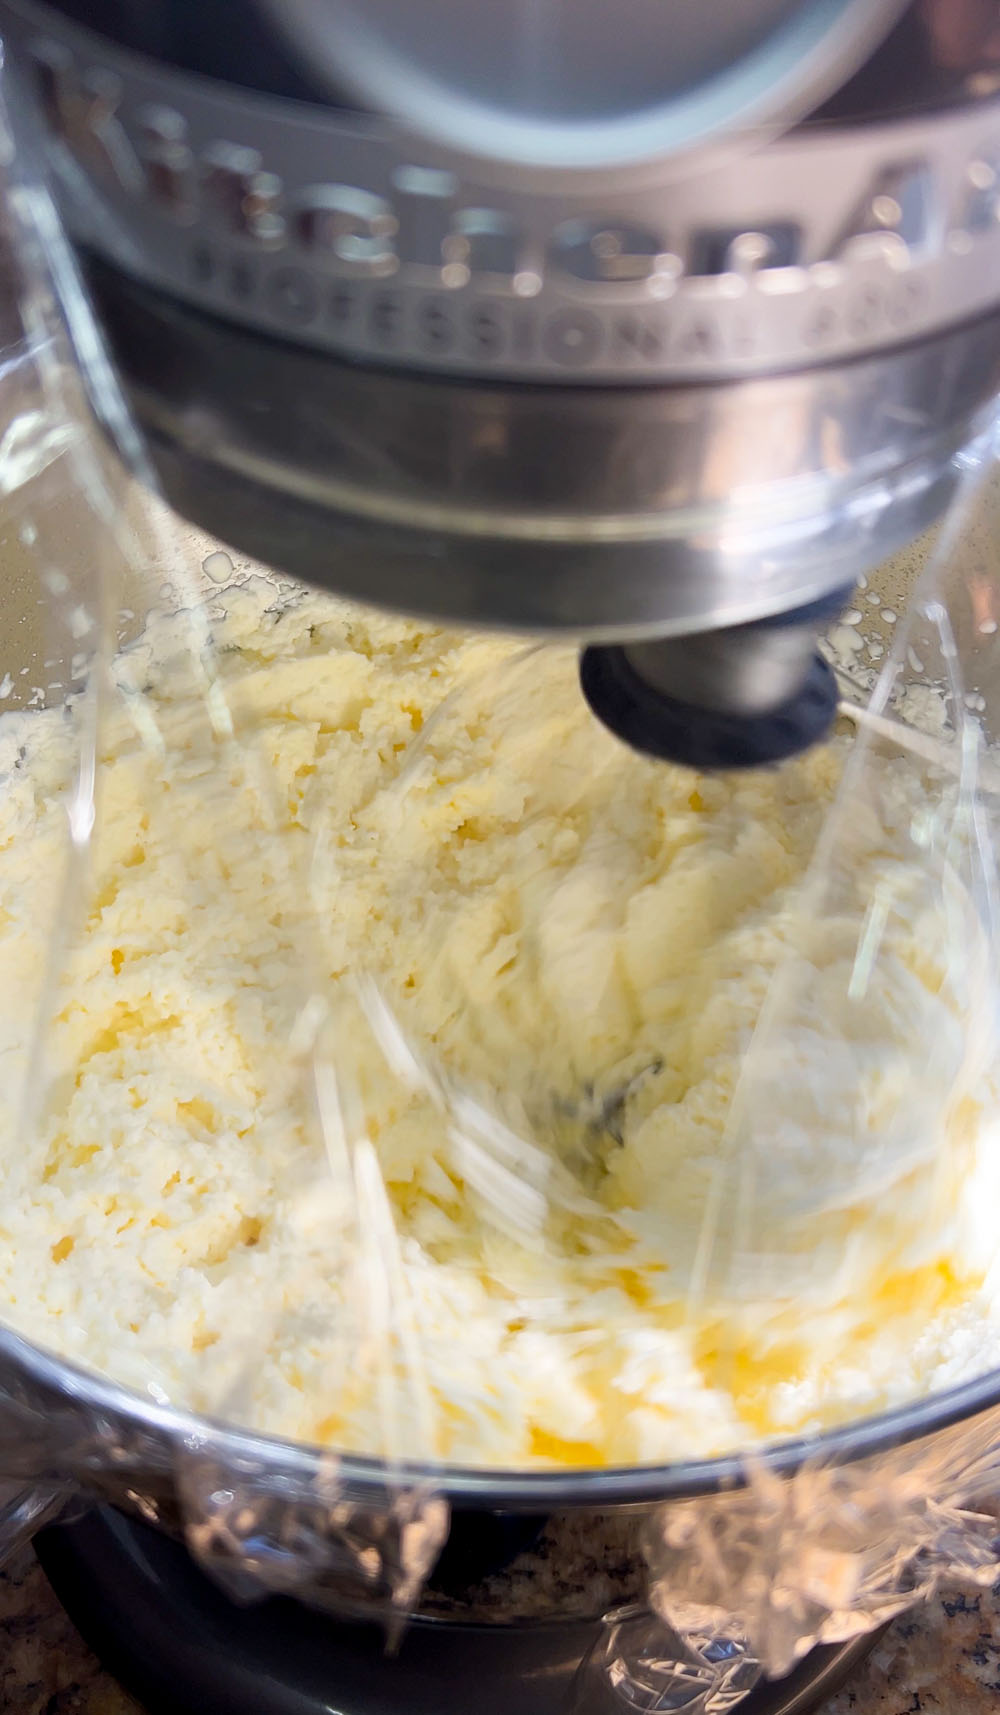
It’s starting to curdle and separate. At this point, it’s a good idea to scrape down the sides of the bowl.
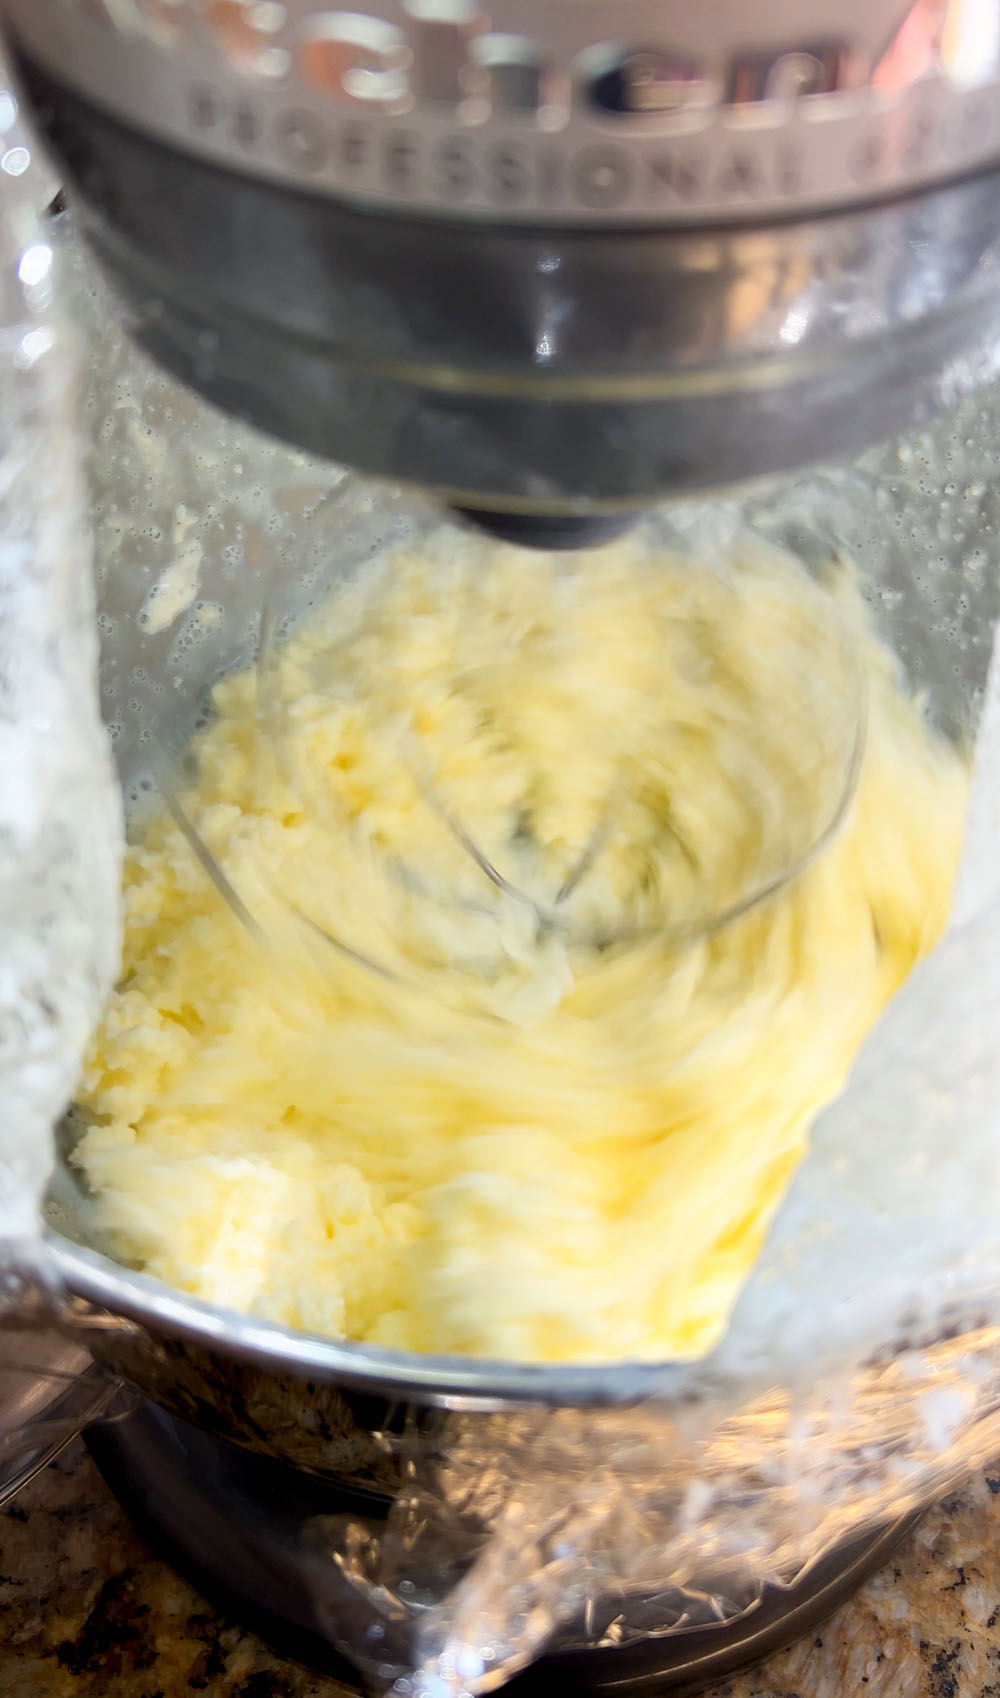
About 30 seconds away from having butter and buttermilk. Slow down the speed of the mixer when you get to this point, or you’ll have buttermilk all over your countertop and not in the bowl.
Perfection!
How to wash cultured butter
Once you have made the cultured butter, it’s very important that you wash it well under ice cold water until the water runs clear. Removing the excess buttermilk is going to prolong its shelf life. However, if it’s something you plan to use right away (and use all of it) you don’t have to be so vigorous in washing it. If you plan to keep this for longer than 2 days, and you don’t wash the buttermilk out of the butter, it will go rancid very quickly and all of your hard work will be wasted.
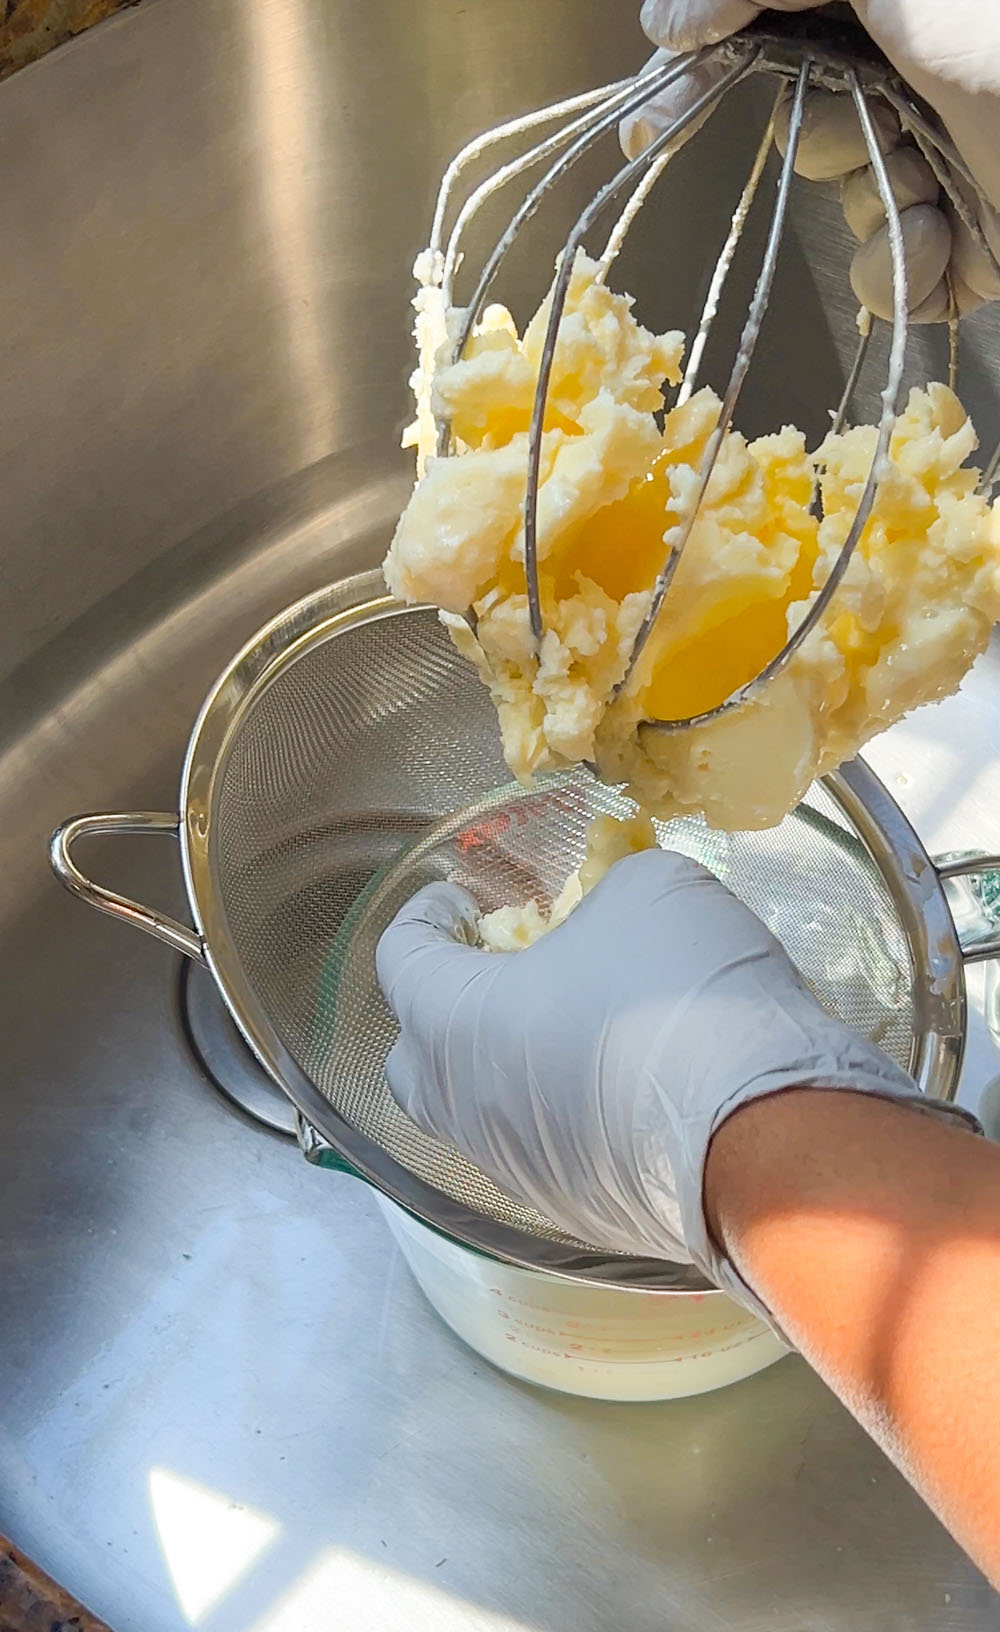
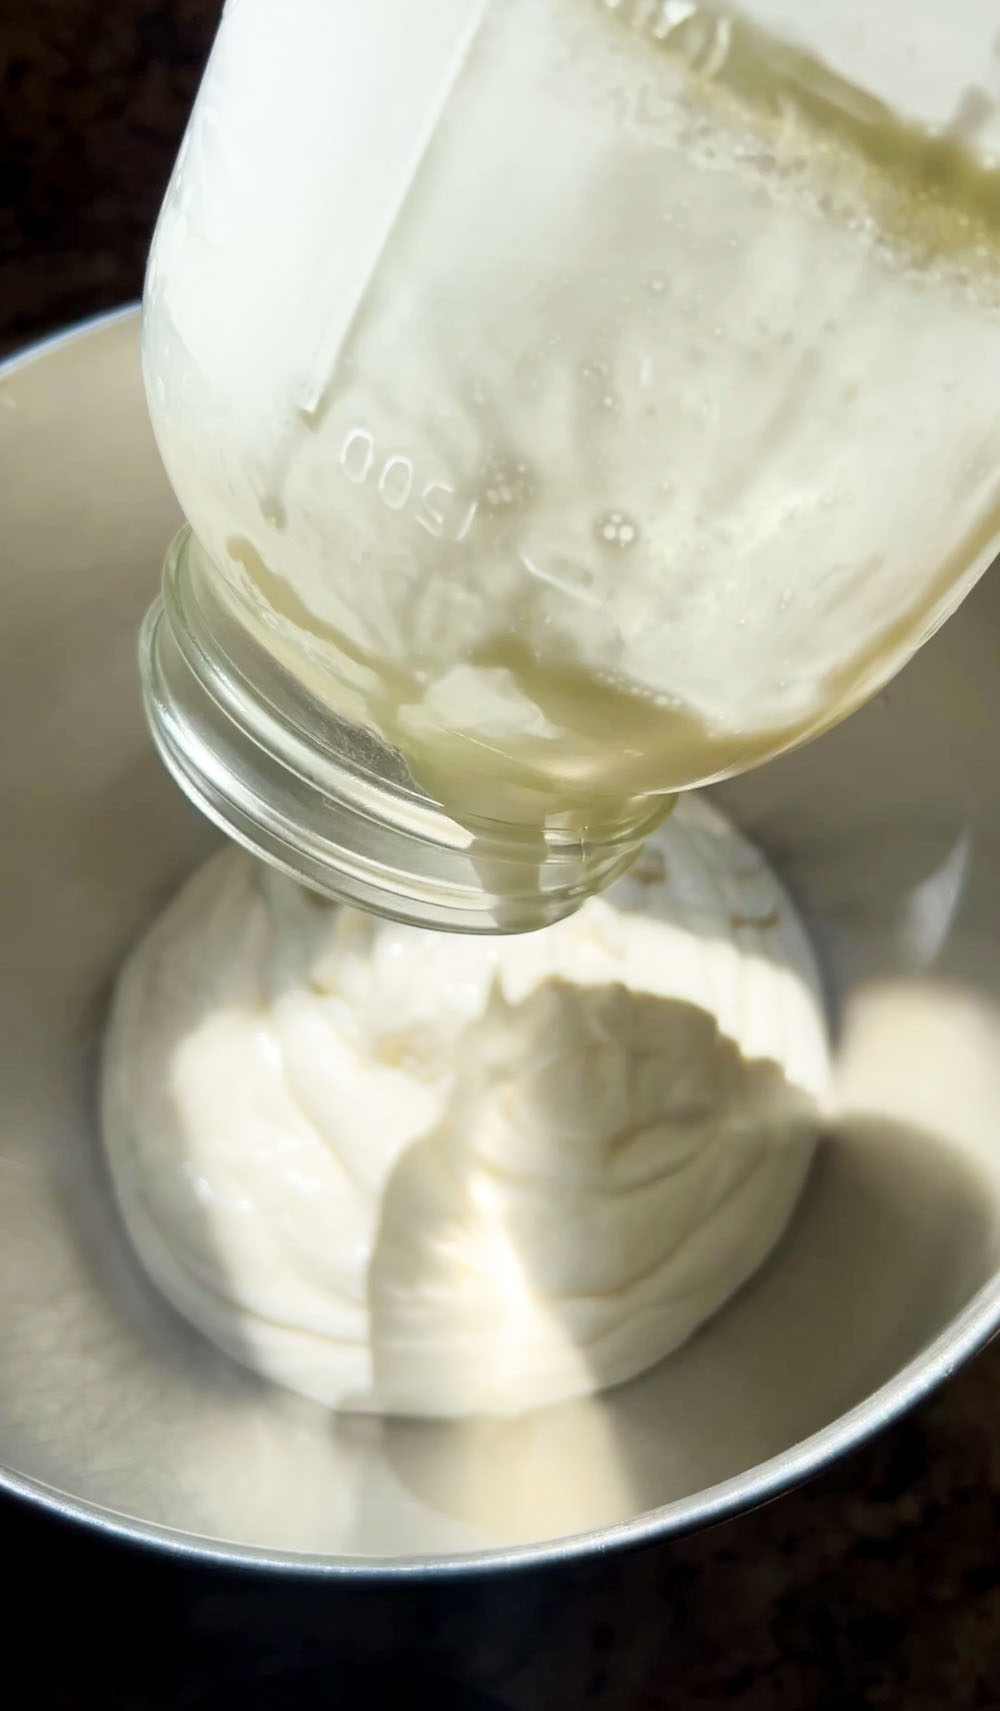
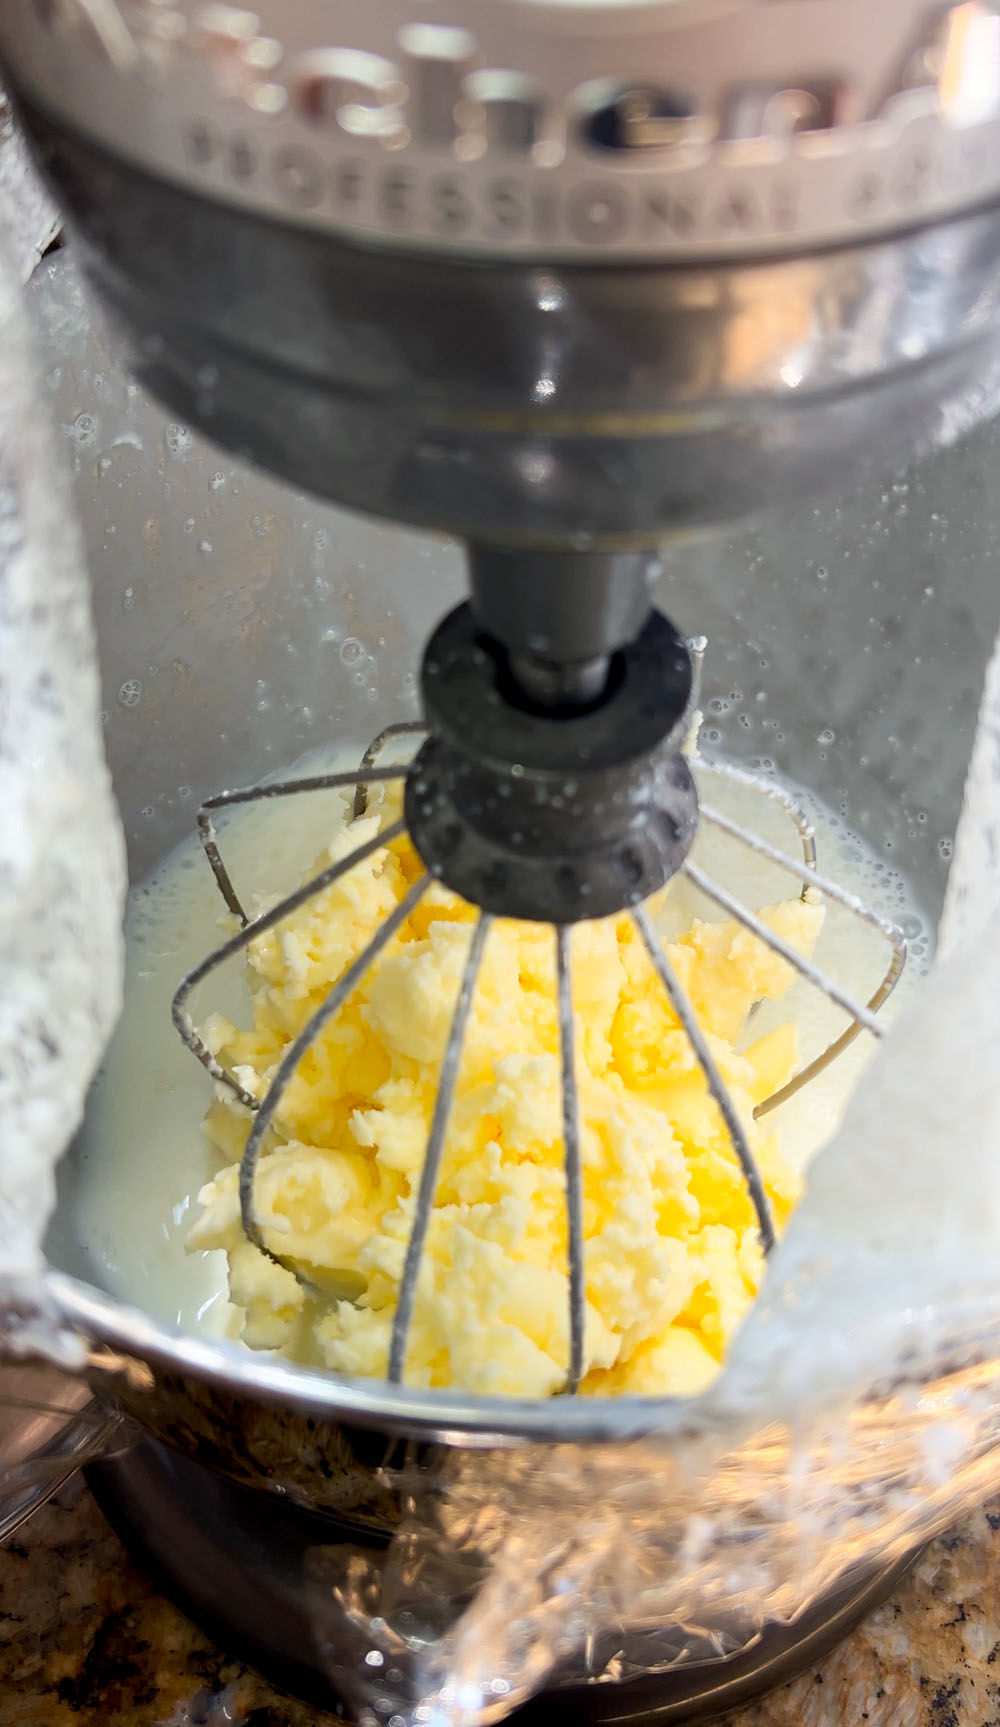
Separate the butter from the whisk attachment, and be sure to drain and contain every drop of that wonderful cultured buttermilk.
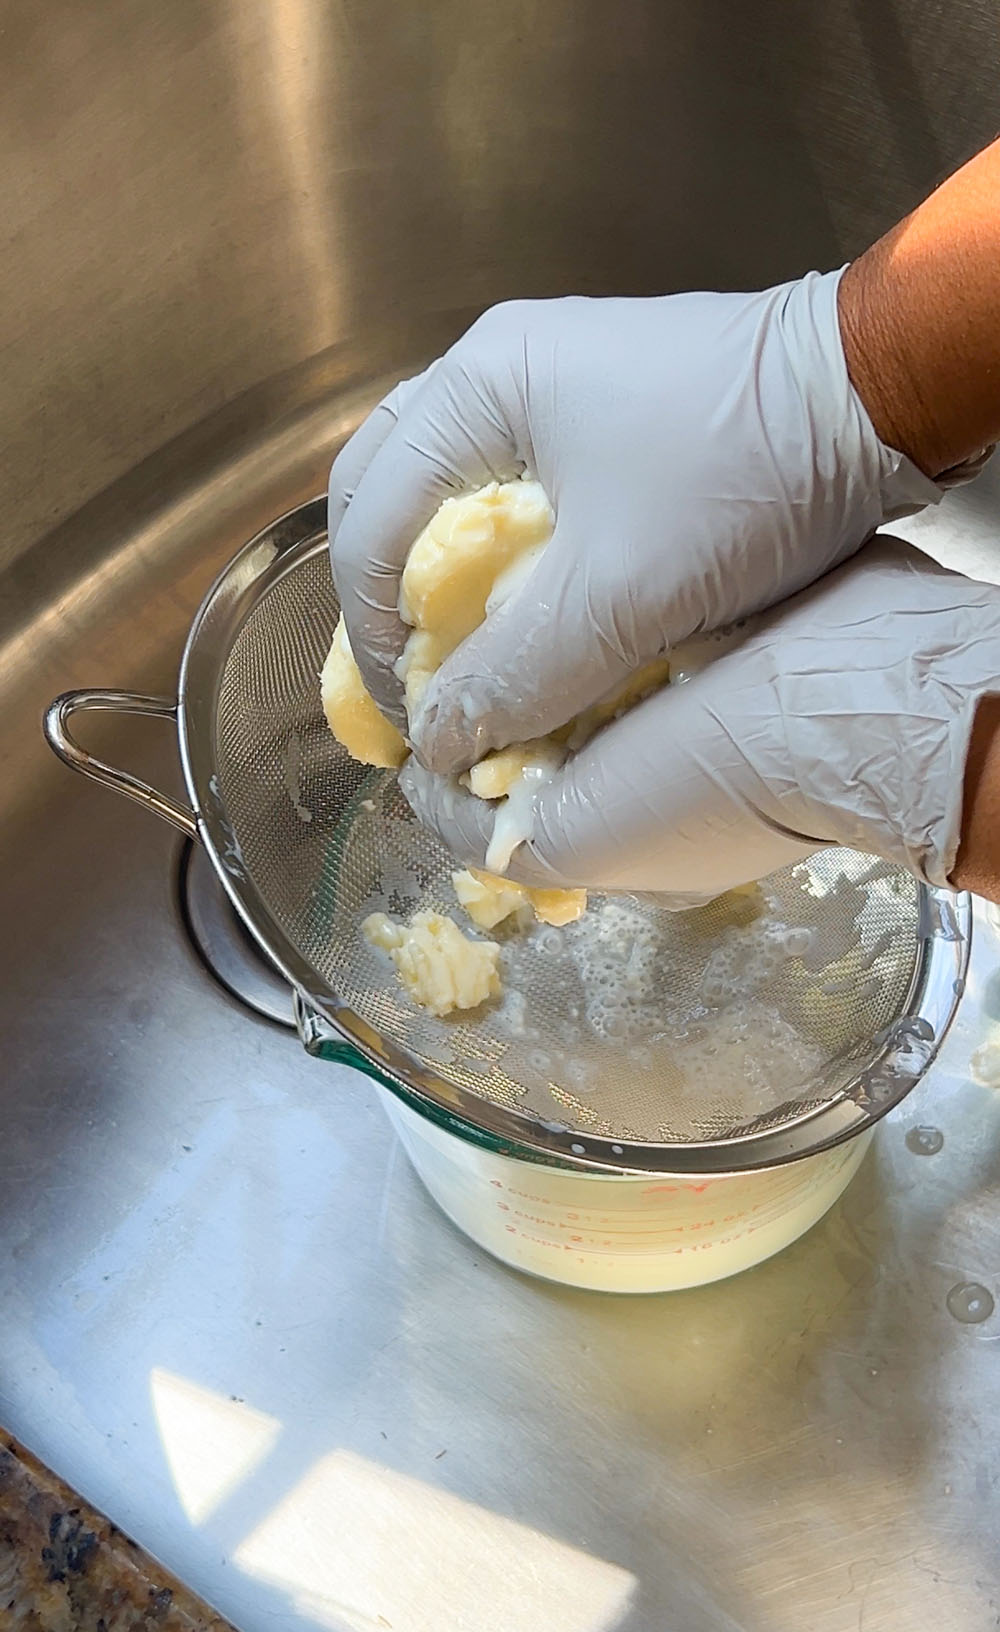
Squeeze the living daylights out of the butter to get every drop of that buttermilk out. You should have about 2 cups of it.
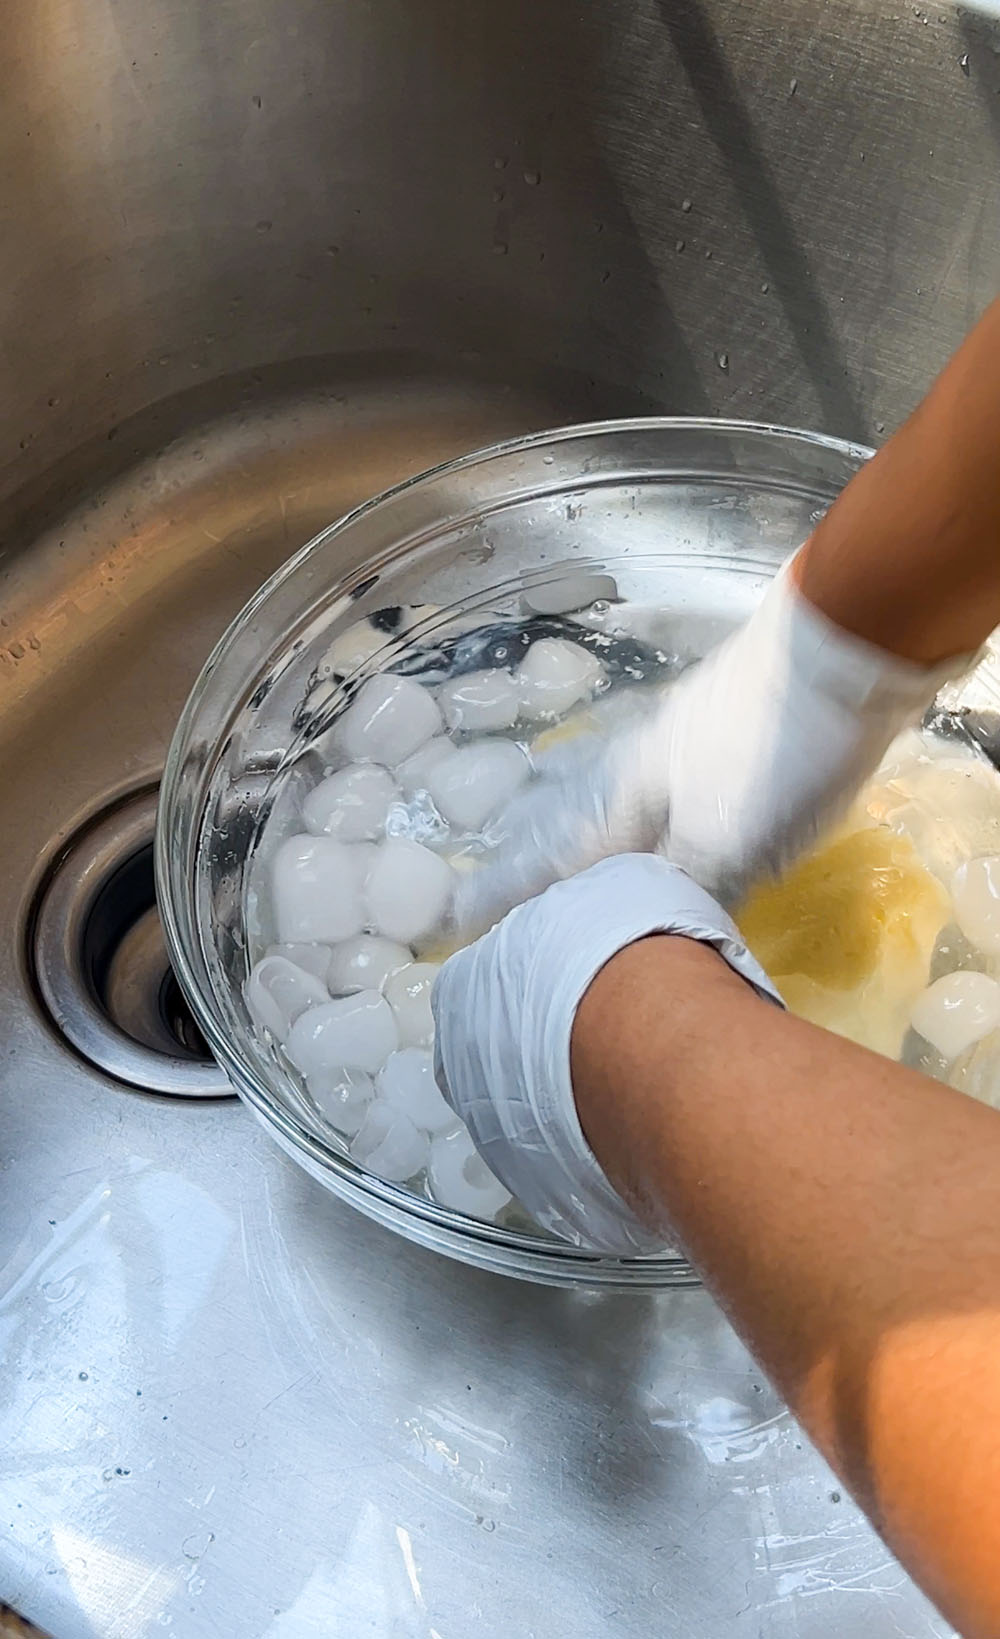
Wash the butter THOROUGHLY in ice water, several times! When the water is clear, your butter is clean. The ice will help keep the butter firm, otherwise this can become an extremely messy task. The warmth of your hands will start to melt the butter, so make sure you use ICE COLD water.
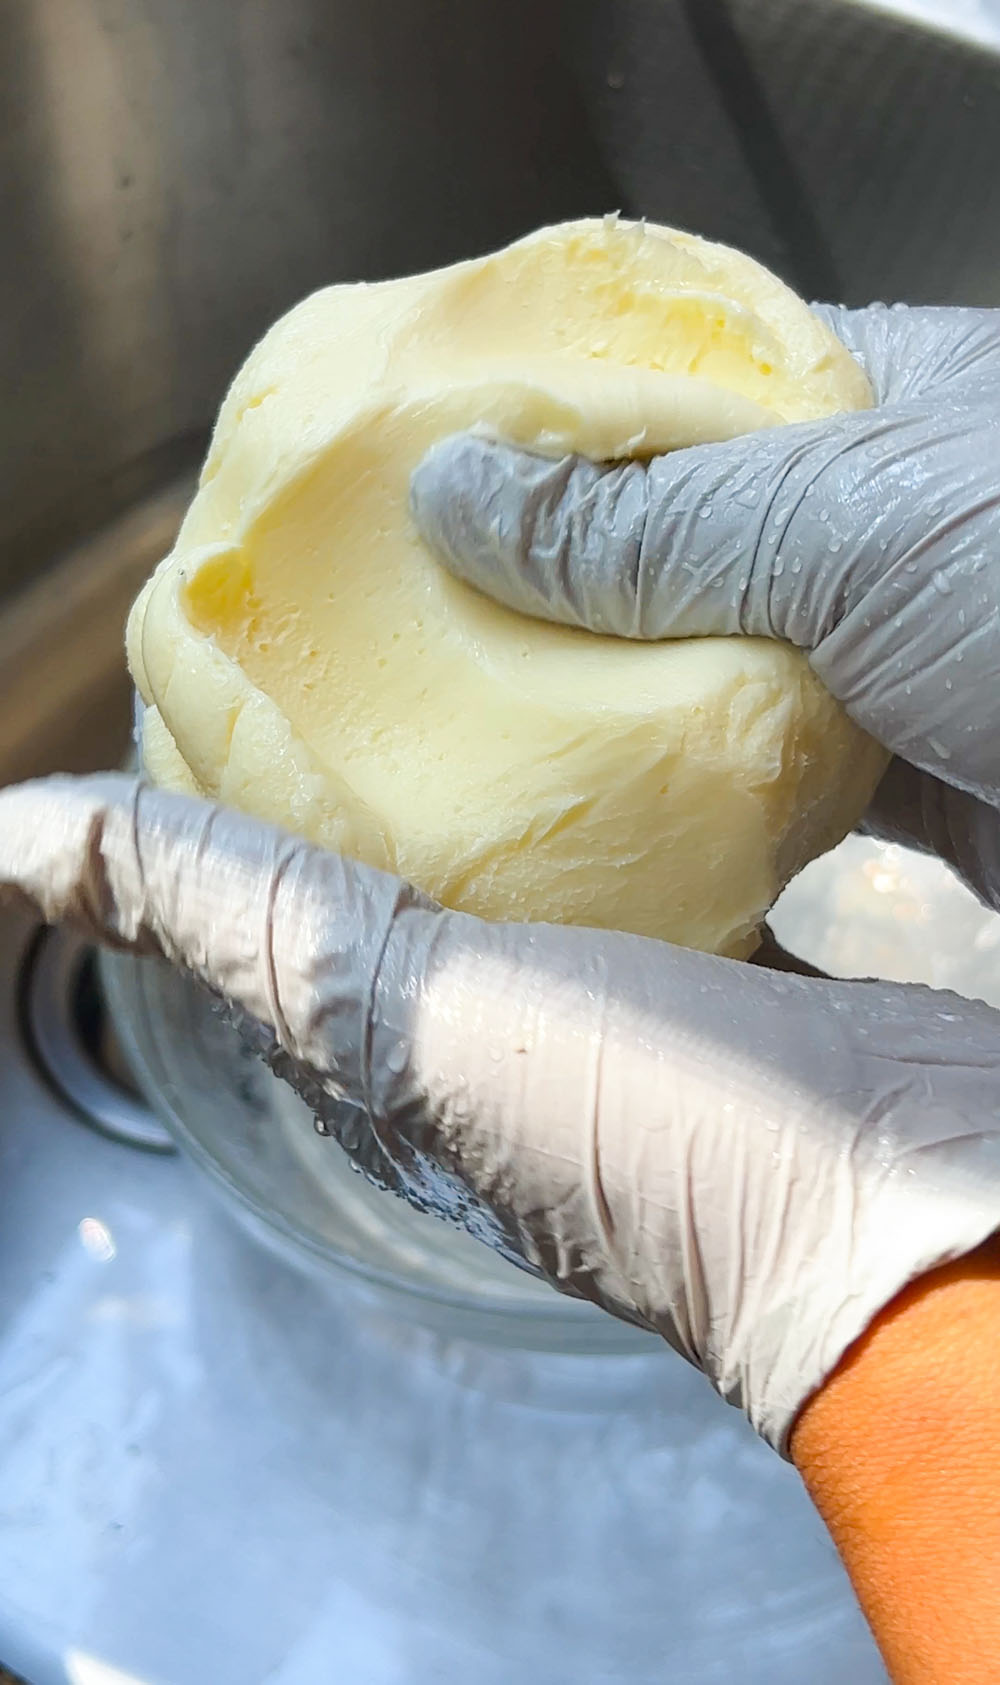
After several washes, you have clean, perfectly smooth cultured butter.
How to season cultured butter
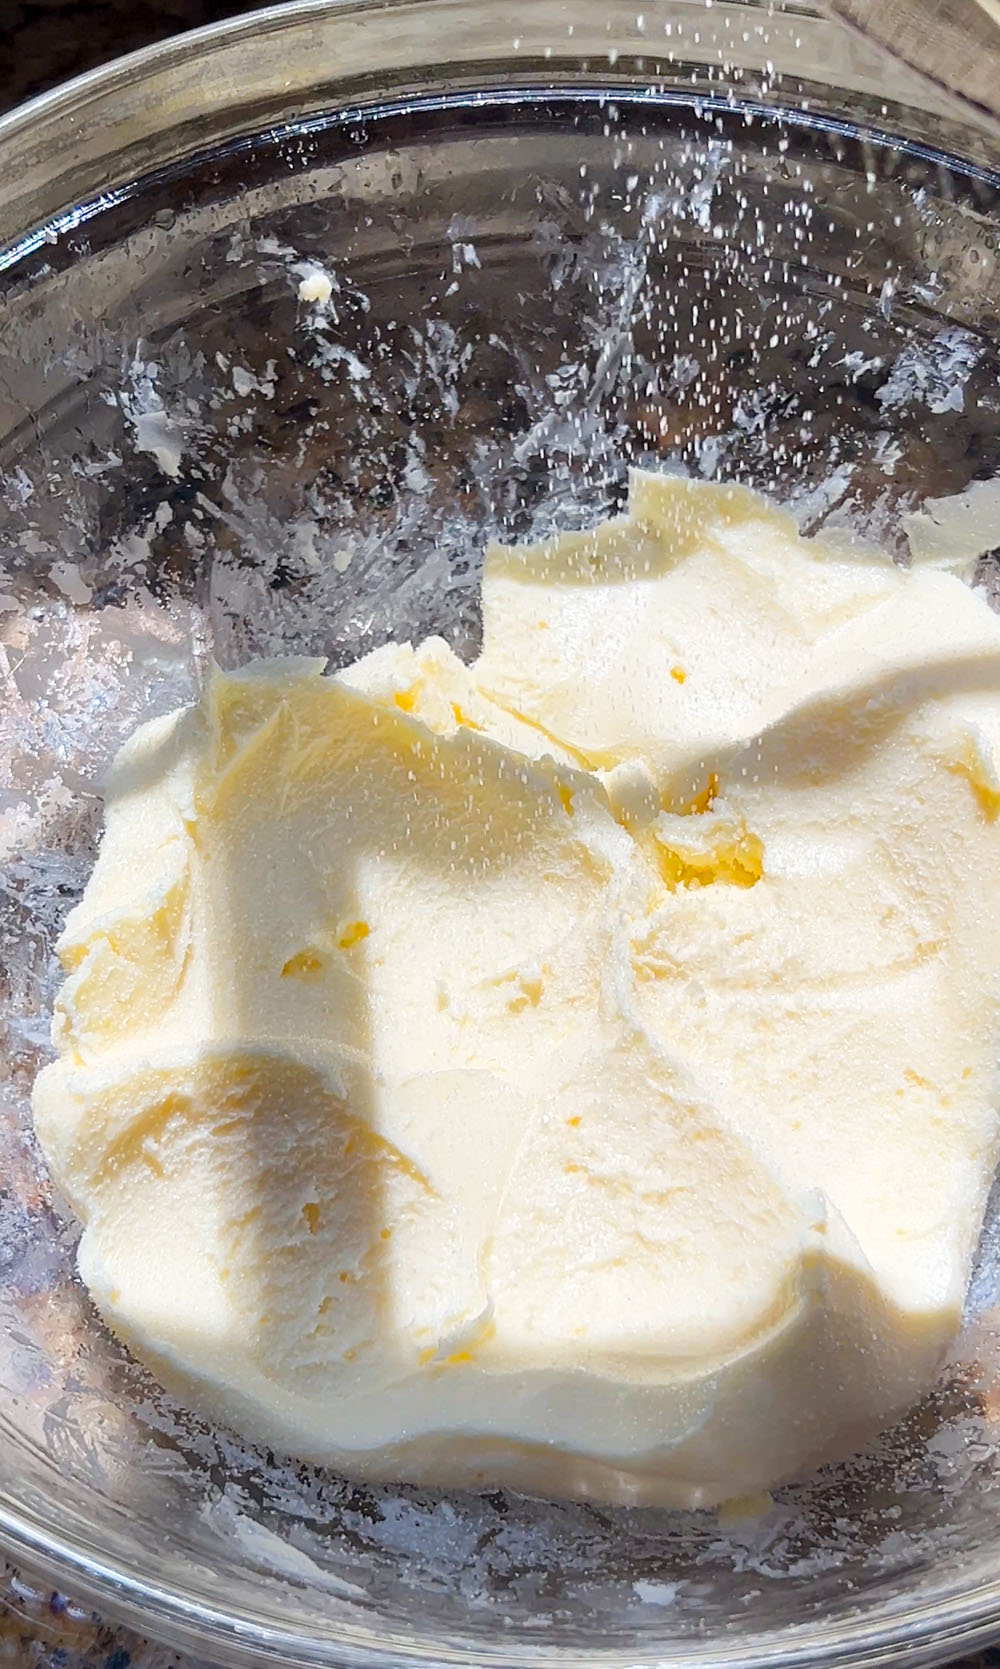
You could leave the butter unseasoned, if you prefer. But it will seriously benefit with a good dose of sea salt to help bring out its naturally tangy flavor — which is delicious! After washing the butter, you just add a desired amount of salt and work it in as well as you can. My advice is to start with about 1/4 teaspoon of fine sea salt, and taste as you go. The beauty of making your own butter is you can control how much or how little salt you want to add.
You could also add other things such as garlic puree, herbs, citrus zest, etc. Once you nail regular cultured butter, try making different batches that are flavored with other aromatics. Be creative!
How to store cultured butter
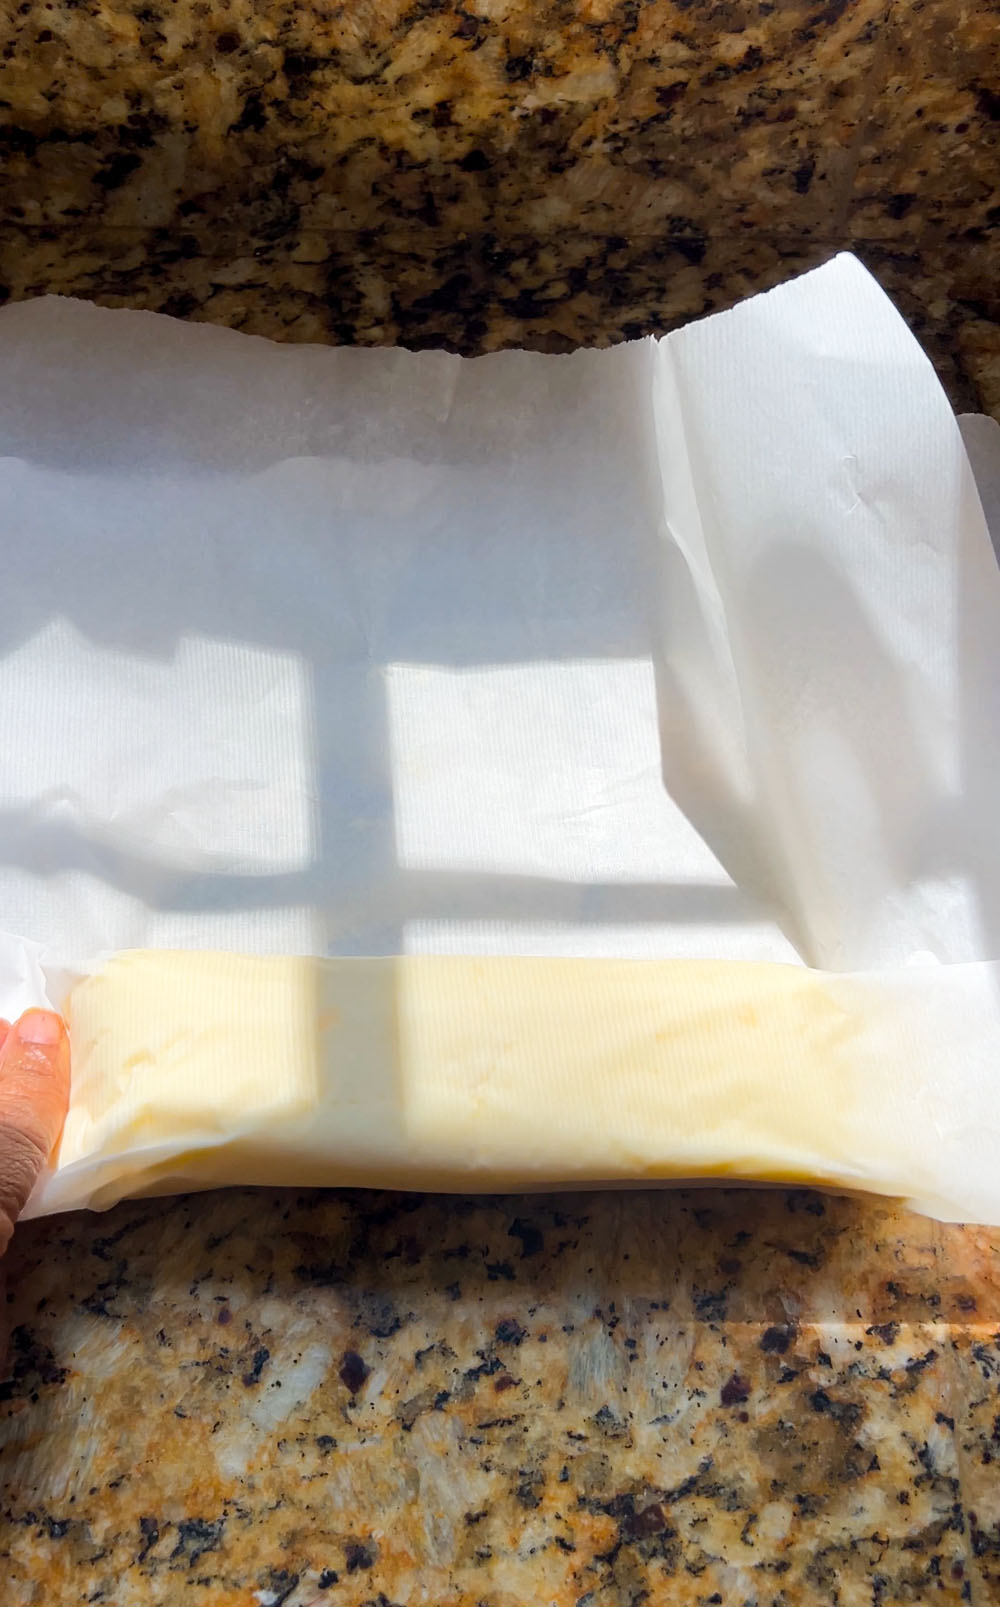
Cultured butter is best stored in the refrigerator inside of an airtight container for up to a month, and will last several months in the freezer if stored properly. You could also wrap it very well in multiple layers of wax or parchment paper, ensuring it’s not exposed to refrigerator air, because it will soak up refrigerator flavors/odors.
I make this butter often, and have several logs of it in my freezer, wrapped in wax paper, parchment paper, and sealed in plastic wrap.
How to use cultured butter
I personally find cultured butter better for eating as a featured ingredient, such as spread on pancakes, toast, biscuits, etc. You could absolutely use it for baking/cooking as you would regular butter. However, the taste of it is so prominent that I just prefer eating it where I can literally taste it. The flavor may be less noticeable in a baked good, but again, that doesn’t mean you cannot use it for that. At the end of the day, it’s still butter, so use it however you’d like!
It’s really good for cooking, too. Sear your meats in it, baste them really well — there’s so many uses. It’s not just for baking.
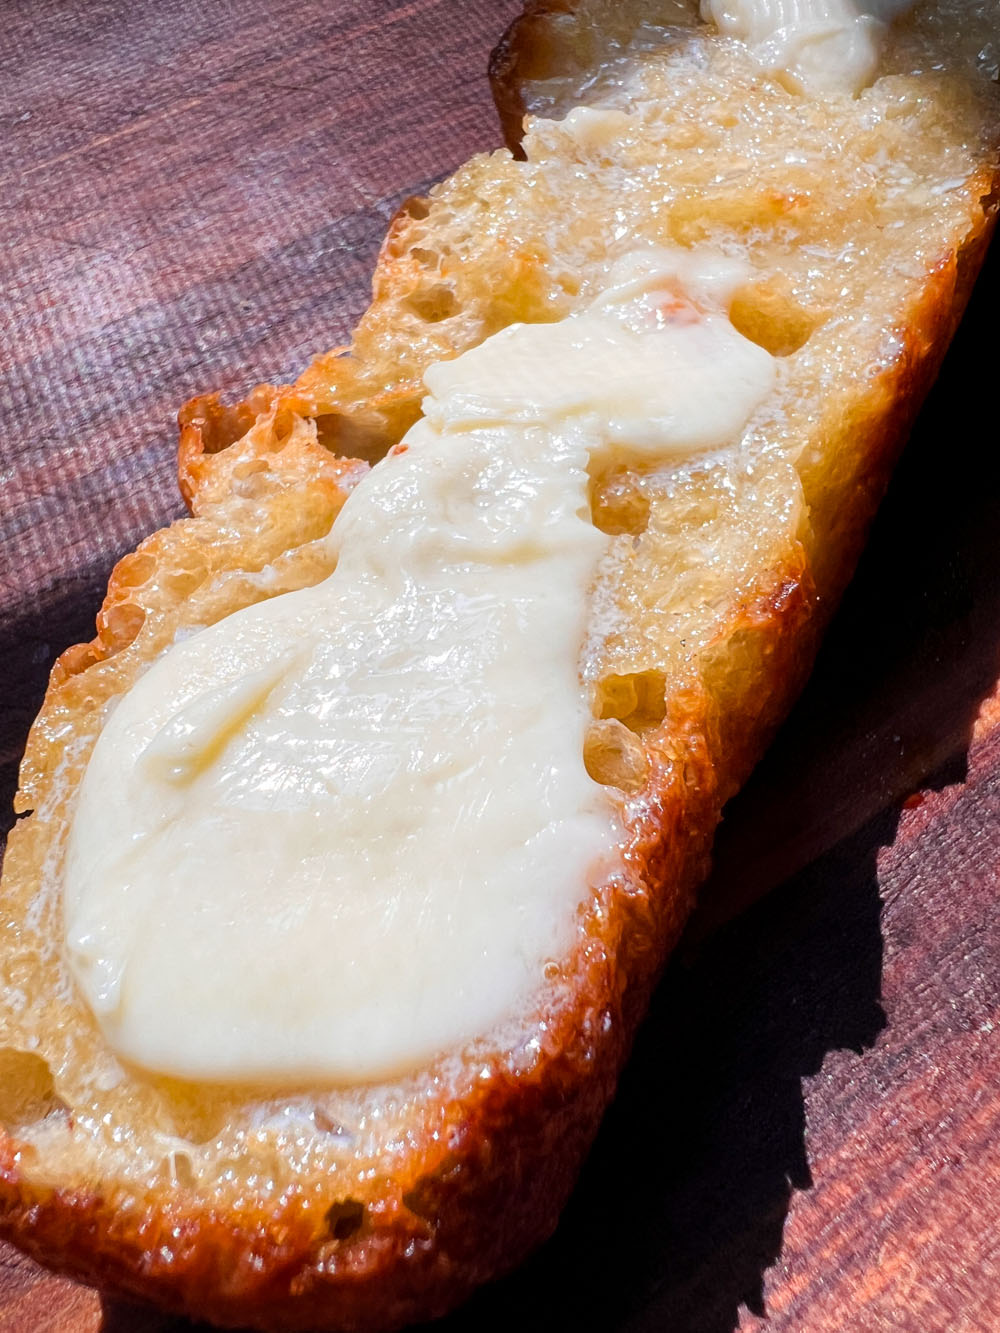
My favorite way to enjoy cultured butter is when I’m able to taste it’s tanginess, front and center. But you can absolutely use this butter for ANY recipe that calls for butter! Go nuts.
What to do with the leftover cultured buttermilk
Look at this cultured buttermilk!! It’s thick, creamy, and super tangy.
Baby, what can’t you do?? The bonus to making cultured butter is having that lusciously thick and super tangy buttermilk leftover for all of your buttermilk needs. You simply store in the fridge in a glass jar with a tight fitting lid (I keep mason jars on deck for this), and use it up in your recipes the way you’d use buttermilk from the store. This cultured buttermilk is far more exceptional than the buttermilk you get from just churning sweet cream.
Use it for biscuits, pancakes, cakes, cookies, frostings, ranch dressing, sauces, marinades, etc.
How long does cultured buttermilk last?
Buttermilk takes a while to “go bad”. It just gets thicker and more fermented over time because of the live cultures. But you’ll know when your buttermilk is bad when it literally stinks in a very bad way. Buttermilk will always smell sour, but it should be a fresh-sour. Your nose will know when the sour smells putrid, god-awful, and just “off”. And visibly, if you see mold on it that’s a clear indication that it’s a goner. At that point, toss it. But you’ve got time.
You could also freeze your buttermilk. Divide it into either small freezer bags, in whatever quantity you want, and keep it there until you need to use it. Thaw it overnight in the fridge and go from there.
Print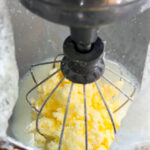
How To Make Cultured Butter (Video and Recipe)
- Total Time: 72 hours
- Yield: 12 ounces of butter, 2 cups buttermilk
Description
Learn how easy and efficient it is to make cultured butter (and cultured buttermilk) right at home with just 2 main ingredients.
Ingredients
- 1 quart (946 ml/946 grams) heavy cream
- 4 tablespoons (1/4 cup/60 ml/60 grams) of either cultured buttermilk, cultured sour cream, cultured yogurt (plain/unsweetened), cultured creme fraiche, or kefir
- Sea salt, to taste
Instructions
Equipment needed
- A tall glass jar large enough to hold all of the cream. You can also use this same jar to store the leftover buttermilk in once you clean it out.
- A chopstick or long-handled spoon for stirring.
- A clean cloth (odorless and lint-free). Cheesecloth works great here.
- A rubber or elastic band to keep the cloth in place.
- A stand mixer, or electric hand-held mixer and large bowl. The stand mixer will get the job done quickly, the hand mixer will work but it’ll take some work because you’ll have to constantly get every corner of the bowl to ensure everything is mixing properly and at the same time.
- A large measuring cup or bowl to collect the strained buttermilk.
- A colander for proper separation.
- Ice and clean water for washing the butter.
- Parchment or wax paper for storing, or a designated air-tight container to store the butter.
- Food-grade gloves for a less-messy handling experience, and to minimize hand/warmth transfer to the butter while handling and washing.
Timing
- Start this process 3 days before you plan to enjoy tangy cultured butter. Example: if you begin this on a Monday morning, you will whip and finish making your butter on Thursday morning.
- Pour the heavy cream into your glass jar, followed by the 4 tablespoons of whichever cultured product you chose to use. Use a chopstick of long-handled spoon to gently combine the heavy cream and cultured product.
- Cover the glass jar with a clean, lint-free cloth and secure it in place with a rubber or elastic band.
- Set the jar somewhere where there’s few odors. Dairy will soak up whatever smell it can find, so be mindful. Leave it in it’s designated spot for 3 whole days from the time of fermentation.
- After 3 full days of fermentation, place the jar in the refrigerator to chill for at least 6 hours. You will notice the cream is either extremely thick as you give it a gentle shake, or it’s not moving at all. That’s to be expected. You basically have creme fraiche at this point.
- After chilling for 6 hours, transfer the thick cream to the bowl of a stand mixer fitted with the whisk attachment. Drape cling film (plastic wrap) around your mixer and bowl to protect your countertops from wearing the mixture.
- Turn the machine on it’s highest speed and let it go, scraping down the sides of the bowl half-way through. When the butter starts to collect into large pieces and you can visibly see buttermilk sloshing around the bowl, immediately reduce the speed of the mixer to low and let it continue to mix until the butter has gathered around the whisk attachment completely, about 20-30 seconds longer. Turn off the machine and gently remove the butter from the whisk attachment.
- If using gloves, put them on now. Place the colander over a large measuring cup or bowl, and pour the buttermilk to get out any small bits of butter left behind. Collect all of your butter into one big ball and firmly squeeze out as much of the remaining buttermilk as you can into the large measuring cup or bowl. When you feel you’ve squeezed all that you can out of it, immediately transfer the butter to a medium-sized bowl of ice water. Spread and knead the butter into the ice cold water a few times, then gather into a ball and squeeze. Dump the dirty water and replace with more ice water. Pro tip: you don’t need an entire bowl filled with water, just a few inches of it. Repeat this cleaning process of kneading the butter into the ice water as many times as necessary until the water is clear. You shouldn’t see any cloudiness in the water. At this point, your butter is clean and ready to be enjoyed and/or stored!
- To season the butter: In the same bowl you washed the butter in (which should now be empty, it’s okay if there’s a thin buttery film inside of the bowl), place the butter back into there and use a spoon or rubber spatula to spread it out a bit. eason the butter with your desired amount of salt. Just a note: in a normal US stick of butter (8-tablespoons), there’s about 1/4 teaspoon of salt in the entire stick, for reference. Stir and fold to ensure all of the butter is seasoned and give it a taste. Once you’re happy with it, transfer the seasoned butter to either a clean sheet of parchment paper to be rolled into a log and stored, or an air-tight container. The butter will keep in your fridge for several weeks, or several months in the freezer. Or, you can immediately enjoy the butter right away!
- Prep Time: 3 days
- Cook Time: 0 minutes
Keywords: how to make cultured butter, how to make cultured buttermilk, how to make butter, homemade butter, homemade buttermilk

Leave a comment