Description
Learn how easy and efficient it is to make cultured butter (and cultured buttermilk) right at home with just 2 main ingredients.
Ingredients
- 1 quart (946 ml/946 grams) heavy cream
- 4 tablespoons (1/4 cup/60 ml/60 grams) of either cultured buttermilk, cultured sour cream, cultured yogurt (plain/unsweetened), cultured creme fraiche, or kefir
- Sea salt, to taste
Instructions
Equipment needed
- A tall glass jar large enough to hold all of the cream. You can also use this same jar to store the leftover buttermilk in once you clean it out.
- A chopstick or long-handled spoon for stirring.
- A clean cloth (odorless and lint-free). Cheesecloth works great here.
- A rubber or elastic band to keep the cloth in place.
- A stand mixer, or electric hand-held mixer and large bowl. The stand mixer will get the job done quickly, the hand mixer will work but it’ll take some work because you’ll have to constantly get every corner of the bowl to ensure everything is mixing properly and at the same time.
- A large measuring cup or bowl to collect the strained buttermilk.
- A colander for proper separation.
- Ice and clean water for washing the butter.
- Parchment or wax paper for storing, or a designated air-tight container to store the butter.
- Food-grade gloves for a less-messy handling experience, and to minimize hand/warmth transfer to the butter while handling and washing.
Timing
- Start this process 3 days before you plan to enjoy tangy cultured butter. Example: if you begin this on a Monday morning, you will whip and finish making your butter on Thursday morning.
- Pour the heavy cream into your glass jar, followed by the 4 tablespoons of whichever cultured product you chose to use. Use a chopstick of long-handled spoon to gently combine the heavy cream and cultured product.
- Cover the glass jar with a clean, lint-free cloth and secure it in place with a rubber or elastic band.
- Set the jar somewhere where there’s few odors. Dairy will soak up whatever smell it can find, so be mindful. Leave it in it’s designated spot for 3 whole days from the time of fermentation.
- After 3 full days of fermentation, place the jar in the refrigerator to chill for at least 6 hours. You will notice the cream is either extremely thick as you give it a gentle shake, or it’s not moving at all. That’s to be expected. You basically have creme fraiche at this point.
- After chilling for 6 hours, transfer the thick cream to the bowl of a stand mixer fitted with the whisk attachment. Drape cling film (plastic wrap) around your mixer and bowl to protect your countertops from wearing the mixture.
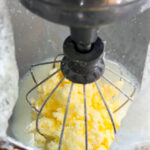
- Turn the machine on it’s highest speed and let it go, scraping down the sides of the bowl half-way through. When the butter starts to collect into large pieces and you can visibly see buttermilk sloshing around the bowl, immediately reduce the speed of the mixer to low and let it continue to mix until the butter has gathered around the whisk attachment completely, about 20-30 seconds longer. Turn off the machine and gently remove the butter from the whisk attachment.
- If using gloves, put them on now. Place the colander over a large measuring cup or bowl, and pour the buttermilk to get out any small bits of butter left behind. Collect all of your butter into one big ball and firmly squeeze out as much of the remaining buttermilk as you can into the large measuring cup or bowl. When you feel you’ve squeezed all that you can out of it, immediately transfer the butter to a medium-sized bowl of ice water. Spread and knead the butter into the ice cold water a few times, then gather into a ball and squeeze. Dump the dirty water and replace with more ice water. Pro tip: you don’t need an entire bowl filled with water, just a few inches of it. Repeat this cleaning process of kneading the butter into the ice water as many times as necessary until the water is clear. You shouldn’t see any cloudiness in the water. At this point, your butter is clean and ready to be enjoyed and/or stored!
- To season the butter: In the same bowl you washed the butter in (which should now be empty, it’s okay if there’s a thin buttery film inside of the bowl), place the butter back into there and use a spoon or rubber spatula to spread it out a bit. eason the butter with your desired amount of salt. Just a note: in a normal US stick of butter (8-tablespoons), there’s about 1/4 teaspoon of salt in the entire stick, for reference. Stir and fold to ensure all of the butter is seasoned and give it a taste. Once you’re happy with it, transfer the seasoned butter to either a clean sheet of parchment paper to be rolled into a log and stored, or an air-tight container. The butter will keep in your fridge for several weeks, or several months in the freezer. Or, you can immediately enjoy the butter right away!
- Prep Time: 3 days
- Cook Time: 0 minutes
Keywords: how to make cultured butter, how to make cultured buttermilk, how to make butter, homemade butter, homemade buttermilk
