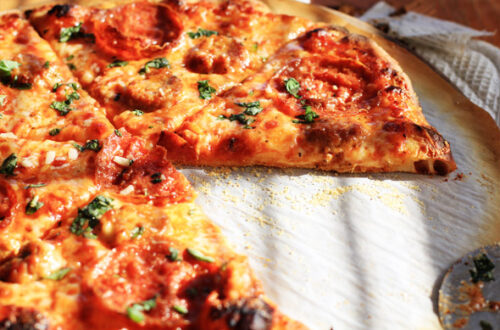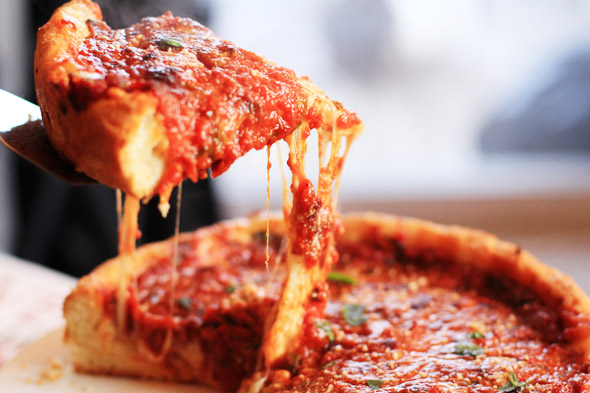
Detroit-style pizza is the love of my life. Well, one of them. I grew up eating pan pizza from Pizza Hut way back in the day, drinking soda out of those dimpled plastic red cups. The thick crust with the lacy edge of cheese was one of the top motivators to get me to read books. Book It! If you know, you know. This Detroit-style pizza recipe is the superior square version of the iconic round pan pizza, and is an absolute keeper.


In this post, you’ll learn:
What is Detroit-style pizza?
Detroit pizza is a rectangular pie with a thick, sturdy fried bottom crust with a lacy cheese edge, just like pan pizza. Although the dough is thicker than a New York or even Chicago Thin-Crust style, it’s not dense.
The crust is slightly chewy, and substantial if you like tons of heavier toppings. The dough has a very nostalgic, slightly boozy aroma from the yeast. The crust and thickness is very similar to focaccia.
The only difference between pan pizza (like old school Pizza Hut) and Detroit-style pizza is that Detroit-style has corners and the sauce is on top of the cheese (like Chicago-style), whereas pan pizza is round and the sauce is under the cheese. They’re both thicker than a Snicker, crispy, and just goddamn delicious.

How to make Detroit-style pizza
This is an incredibly easy and fast Detroit pizza recipe. You can achieve Motor City perfection in just about or a little over three hours, depending on how fast you move and how warm your environment is.
This Detroit pizza recipe uses all-purpose flour, but bread flour can be used instead. You may need to adjust the water content by a few tablespoons if using bread flour. This is a sticky dough with high-hydration. Be sure to flour your work surface as well as your hands when kneading it into a ball and transferring it to the greased baking dish.
Diastatic malt powder is an incredible secret ingredient that enhances the texture and color of many different doughs — especially pizza dough. In this recipe, it further tenderizes the dough so we get a sturdy yet fluffy crumb with the perfect chew. It improves the crust, flavor, and crumb of so many different types of doughs. I highly recommend it!
- First you combine the flour, yeast, sugar, diastatic malt (if using), and warm water (around 90 degrees F) until a wet shaggy mix forms. The dough gets covered to rest and hydrate for 15 minutes, then comes the salt. This is also known as autolyse (source).
- Next, the dough gets kneaded in your stand-mixer for about 10 minutes, then transferred to a greased pan to rest for 15-20 minutes before a gentle stretch in the pan. We proof for 2 hours in a warm spot. You’ll then top and bake on the lower rack of a super hot 450 degree F oven for 15-20 minutes.
During the 2-hour proofing stage is when you can prep the other ingredients (shred cheese, prep toppings) and make your sauce. The sauce can also be made a day ahead, saving you even more time.
When topping, prioritize the lacy cheese crust (frico) before you add everything else. Line the cheese along the edges, then proceed to cover the surface of the dough with the remaining cheese. Add the toppings you wish, along with the sauce. Traditionally, the sauce is arranged in stripe-like lines, but baby, do you!
To get that signature crispy crust, olive oil is the most used and suggested. It’s flavorful and rich. Avocado oil is fantastic as well, and has an even higher smoke point than olive oil. You could blend the two oils for the best of both worlds.
Watch me make a Detroit-style pizza

What’s the best pan for Detroit-style pizza?
A Detroit pizza just ain’t a Detroit pizza without the proper baking pan. Because the crust and the frico edge is so signature, it’s important you invest in the proper baking pan.
- The pre-seasoned hard anodized aluminum Lloyd pizza pan is a superior choice. They’re literally made for Detroit-style pizzas, because the material allows the heat to reflect against the dough to help fry it up just right, as well as caramelize the lacy cheese edge you’re going for.
- Also, the pre-seasoned metal Blue steel Detroit pan is another top-tier baddie that will give you the absolute best result. You cannot go wrong with either of these two options.
Other suggestions:
- This 13×9 cast-iron baking pan is also great. Just make sure the cast-iron is properly seasoned and nothing can stick to it.
- In a pinch, you could use a non-stick rectangular cake pan such as this one by USA Pans. It won’t give you what the Lloyd or Blue steel pan will, but you’ll still have a decent pizza.
- Anything nonstick and dark-coated should be an okay option, though I cannot promise optimal results.
Avoid glass. Glass doesn’t conduct heat like the vessels aforementioned, and you will NOT get the crust needed or the frico around the edges like authentic Detroit-style pizza.
Cheese options for Detroit pizza
In Michigan they use brick cheese. Brick cheese is a high-fat semi-soft cheese that originated in America, but is extremely hard to find outside of Michigan – if you can find it at all. The younger version is considered mild, buttery, and slightly sweet. The mature version is considered pungent, strong, and tangy. Apparently, it melts beautifully, which makes it perfect for pizza and grilled cheese sandwiches.
Whole-milk low-moisture mozzarella is a fantastic substitute, period. You can find it everywhere. I would highly recommend that you stay far away from PART SKIM mozzarella. It’s drier and more “plasticky” as it melts. It’s gross, in my opinion. So please make sure you buy WHOLE-MILK mozzarella.
Another great substitute cheese for Detroit-style pizza is monterey-jack. Personally, I would blend it with the whole milk mozzarella. I’ve also made this pie a “Hawaiian Detroit Pizza” and used a combination of whole-milk mozzarella and oaxaca cheese. It was divine! Create any blend you want, just make sure you shredded it!
The sauce is slightly sweeter
Detroit-style pizza sauce is lined directly on top of the cheese (like racing stripes), and is a little sweeter than a traditional pizza sauce. Just about every other pizza sauce recipe is literally just hand-crushed tomatoes and a little salt. But with this sauce, there is a purposeful addition of sugar added to the sauce that works great to balance the savoriness of the other toppings.
Crushed tomatoes make this sauce easy to whip up even a day ahead. I don’t usually use crushed tomatoes because I don’t want to open a 28-ounce can just for about 1 to 2 cups of sauce. If you can find a 14-ounce can of crushed tomatoes, use that! I also find that a 14-ounce can of diced tomatoes works well because it can be pulsed in a food processor to mimic crushed tomatoes.
For this Detroit pizza recipe, we’re not cooking the sauce ahead of time. Because it’s laying on top of the pizza and not under the cheese, the intense heat from the oven will blast it and cook it very quickly.
In a pinch you can always use your favorite jarred pizza sauce, nobody will judge you.

The topping options are endless
Listen, this is a thick mama so pile it on! This crust is built Ford-tough, so if you’re shy about toppings, stick to a daintier crust lol. But if you just wanna do a cheese pie, I’m not mad. It will be divine.
- I’ve made this exact pizza with “Hawaiian Pizza” ingredients (grilled pineapple, spicy sausage, pepperoni, jalapenos).
- I’ve done a meaty mushroom version.
- Try a Buffalo or BBQ Chicken pizza.
- You could also do a seafood option with crab or shrimp.
- A white Detroit-style pizza would be amazing.
Get creative!

But whatever you do, trust me when I say that a few dollops of Toom Garlic Dip will send your pizza to the frickin moon.
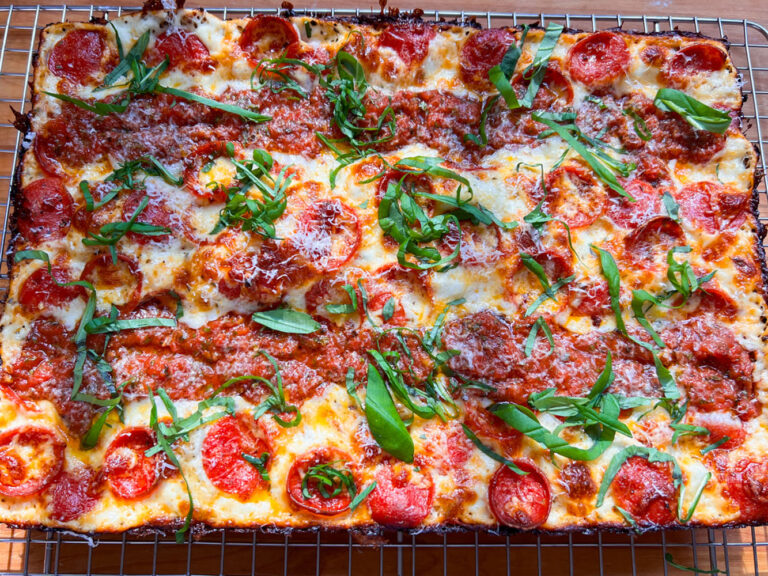
Detroit-style Pizza
Deliciously easy thick Detroit-style pizza with a super crispy bottom and lacy caramelized cheese edge. You will love this recipe! Dough recipe slightly adapted from ATK
- Total Time: 3 hours 20 minutes
- Yield: 6 to 8 slices 1x
Ingredients
Pizza dough
- 319 grams all-purpose flour (2 1/4 cups)
- 6.5 grams granulated sugar (1 1/2 teaspoons)
- 5 grams instant-yeast (1 1/2 teaspoons)
- 3 grams diastatic malt powder (1 teaspoon), optional but recommended
- 240 grams warm water, 90 degrees F (1 cup)
- 5 grams fine salt (3/4 teaspoon)
- *Extra virgin olive oil, to coat baking pan (SEE NOTE)
No-cook sauce
- 1 14-ounce can crushed tomatoes (SEE NOTE if using diced)
- 1 tablespoon fresh basil, finely chopped
- 1 teaspoon dried basil
- 1 teaspoon dried oregano
- 1/2 teaspoon crushed red pepper flakes (optional)
- 1 teaspoon garlic paste (or fresh minced garlic)
- 1/2 teaspoon granulated sugar
- 1 tablespoon extra virgin olive oil
- Salt and pepper, to taste
Toppings used in this recipe
- Toom Garlic Dip
- 1 pound whole-milk low-moisture mozzarella, shredded (do NOT use pre-shredded)
- Pepperoni
- Pizza Seasoning
- Parmigiano Reggiano
- Fresh Basil
Equipment needed
- Stand mixer (or hella arm muscle)
- Lloyd Detroit Pizza Pan, Blue Steel Pizza Pan, or large baking pan
- Bowl scraper or rubber spatula
Instructions
Before you begin
Turn the light in your oven on to create a warm proofing environment. Do not turn the oven on.
For the sauce
- Add all of the sauce ingredients to a small bowl. Taste and adjust, then cover and set aside. If making a day ahead, refrigerate until ready to use.
- If using diced tomatoes, pulse all ingredients in a food processor until it’s broken down but textured (semi-chunky). It should not be completely smooth.
Prep toppings + prepare pan
- Shred your cheese, then refrigerate until ready to use. Don’t chop your basil until you’re ready to garnish, to prevent it from oxidizing.
- Pour about 3 to 4 tablespoons of extra virgin olive oil to your pizza pan, and be sure to spread the oil along the sides of the pan. Set aside.
For the dough
- Add the flour, granulated sugar, yeast, and diastatic malt powder (if using) the bowl of your stand mixer and whisk to combine. Pour in the warm water, and mix to combine until no dry pockets of flour remain. When the dough comes together in a sticky yet cohesive ball, cover with plastic wrap and allow it to rest for 15 minutes.
- After 15 minutes, hook the bowl to the stand mixer and attach the dough hook. Sprinkle the salt over the dough, and mix on medium speed (speed 6 on a KitchenAid) for 8 to 10 minutes until the dough begins to pull away from the bottom of the bowl. See video for visual reference.
- Use a plastic bowl scraper or rubber spatula to transfer the dough from the mixer bowl to a floured surface.
- Knead it into a smooth ball for 1 minute. It’s a sticky dough, so don’t freak out. Just add a little more flour (to your hands as well) to help bring it together, about 2 to 3 tablespoons. You’re only adding enough flour to help you gather it into the oiled pan.
- Place the dough in the center of the oiled pizza pan, and cover the pan (not the dough) with plastic wrap. Allow the dough to rest for 15-20 minutes in the turned-off oven with just the light on.
- After 15 to 20 minutes, it’s time to stretch the dough. Pour about a tablespoon of olive oil to your hands and gently press the dough out towards all corners of the pizza pan (it WILL NOT reach the corners and that’s okay, we’re just trying to coax it). Use the palms of your hands and the base of your fingers to gently stretch the dough, lifting it if you need to. See video for reference. If the dough isn’t cooperating (not stretching AT ALL), it needs a little more time to rest (about 10-15 more minutes) before trying again.
- Once the dough is stretched, cover the pan (not the dough) with plastic wrap and proof for 2 hours (up to 3 hours) in a warm spot. The turned-off oven with the light on is great, but you’ll need to remove the pizza at least 30 minutes before it’s time to preheat the oven. Continue to keep the dough warm by covering it with a tea towel while the oven preheats to 450 degrees F. Example: if you started proofing at 1pm, remove the dough from the oven at 2:30pm and preheat the oven. Set the oven rack to the lower position (about 5 inches above the heating element).
- After proofing for 2 to 3 hours, the dough should be doubled in size and reaching all corners of the pizza pan (see video for reference). Your oven should have been preheating for at least 30 minutes.
Build the pizza
- Add small sporadic dollops of Toom Garlic Dip all over the dough, if using.
- Cover the dough with cheese all the way to the edges of the pan (the amount used here is up to you). I ended up using all of the cheese, but you can use less. I always add a tiny pinch of fine salt to mozzarella because it’s bland, but you don’t have to (and you don’t need much at all). If using the pizza seasoning, add it to the cheese.
- Arrange the pepperoni all over the cheese, as much or as little as you want.
- Finish with two to three stripes of the prepared sauce. Just think about how you plan to slice it in order to determine how many sauce stripes and how thick or thin you want them. You could also just dollop the sauce all over, it really doesn’t matter.
- Bake the pizza on the lower rack of your 450 degree F oven for 15 to 20 minutes or until the cheese in the center is bubbling and lightly spotted brown. Heads up, this can get a little smoky.
- Remove the pizza from the oven and let it rest in the pan for 2 to 3 minutes. Gently run a butter knife or small offset spatula along the sides of the pizza to loosen it, then transfer it to a baking rack to cool for 5 minutes before cutting.
- Garnish with parmigiana reggiano, fresh basil.
- Cut into 6 or 8 slices and serve.
- Enjoy.
Notes
- If using diced tomatoes, pulse in a food processor to break them down until they resemble crushed tomatoes.
- A high smoke point oil, such as avocado oil can be used in place of olive oil.
- Don’t use part-skim mozzarella. It doesn’t taste good, nor does it melt well. A high-fat gooey cheese is best.
- Prep Time: 3 hours
- Cook Time: 20 minutes
- Category: breads, pizza
- Method: Baking